Editing a scene
Overview
In this tutorial, you will learn how to modify a Mitsuba scene after it has been loaded from a file. You might want to edit a scene before (re-)rendering it for many reasons. Maybe a corner is dim, or an object should be moved a bit to the left. Thankfully we can use the traverse mechanism to perform such modifications in Python with Mitsuba 3. As we will see in later tutorials, this mechanism is also essential for inverse rendering applications and more.
🚀 You will learn how to:
List exposed parameters of Mitsuba objects
Edit a scene and update its internal state accordingly
Loading a scene
Following the same steps as in Mitsuba quickstart tutorial, let’s import mitsuba, set the desired variant and load a scene from an XML file on disk.
[1]:
import drjit as dr
import mitsuba as mi
mi.set_variant('llvm_ad_rgb')

scene = mi.load_file("../scenes/simple.xml")
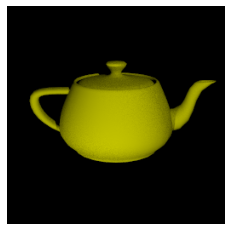
Let’s quickly render this scene.
[2]:
original_image = mi.render(scene, spp=128)

import matplotlib.pyplot as plt
plt.axis('off')
plt.imshow(original_image ** (1.0 / 2.2));
Accessing scene parameters
Any Mitsuba object can be inspected using the traverse() function, which returns a instance of SceneParameters. It has a similar API to Python dict and holds all parameters that are exposed by the input object and its children. Therefore, when given a scene as input, this function will return the parameters of all
the objects present in the scene.
Let’s print the paramters available in our teapot scene.
[3]:
params = mi.traverse(scene)
print(params)
SceneParameters[
  ----------------------------------------------------------------------------------------
  Name                                 Flags    Type           Parent
  ----------------------------------------------------------------------------------------
  sensor.near_clip                              float          PerspectiveCamera
  sensor.far_clip                               float          PerspectiveCamera
  sensor.shutter_open                           float          PerspectiveCamera
  sensor.shutter_open_time                      float          PerspectiveCamera
  sensor.film.size                              ScalarVector2u HDRFilm
  sensor.film.crop_size                         ScalarVector2u HDRFilm
  sensor.film.crop_offset                       ScalarPoint2u  HDRFilm
  sensor.x_fov                         ∂, D     Float          PerspectiveCamera
  sensor.principal_point_offset_x      ∂, D     Float          PerspectiveCamera
  sensor.principal_point_offset_y      ∂, D     Float          PerspectiveCamera
  sensor.to_world                      ∂, D     Transform4f    PerspectiveCamera
  teapot.bsdf.reflectance.value        ∂        Color3f        SRGBReflectanceSpectrum
  teapot.silhouette_sampling_weight             float          PLYMesh
  teapot.faces                                  UInt           PLYMesh
  teapot.vertex_positions              ∂, D     Float          PLYMesh
  teapot.vertex_normals                ∂, D     Float          PLYMesh
  teapot.vertex_texcoords              ∂        Float          PLYMesh
  light1.sampling_weight                        float          PointLight
  light1.position                               Point3f        PointLight
  light1.intensity.value               ∂        Color3f        SRGBReflectanceSpectrum
  light2.sampling_weight                        float          PointLight
  light2.position                               Point3f        PointLight
  light2.intensity.value               ∂        Color3f        SRGBReflectanceSpectrum
]
As you can see, the first level of our scene graph has 4 objects:
the camera (
sensor)the teapot mesh (
teapot)two light sources (
light1andlight2).
Some of those objects have nested child objects, like teapot.bsdf.
Names like teapot are defined in the id field in the XML file. Parameters such as teapot.vertex_positions or sensor.far_clip are documented in their respective parent’s plugin documentation (see PLYMesh and PerspectiveCamera). The plugin
documentation lists which parameters are exposed, as well as all input parameters it takes in the XML file.
If you wish to modifiy a plugin’s parameter that is not exposed with traverse, you still have the option to modify the XML file directly. traverse is merely a convenience function to edit scene objects in-place.
Individual scene parameters can be accessed with the __getitem__ operator, providing the key corresponding to the parameter. Let’s print some scene parameter values.
[4]:
print('sensor.near_clip:             ',  params['sensor.near_clip'])
print('teapot.bsdf.reflectance.value:',  params['teapot.bsdf.reflectance.value'])
print('light1.intensity.value:       ',  params['light1.intensity.value'])
sensor.near_clip:              0.009999999776482582
teapot.bsdf.reflectance.value: [[0.9, 0.9, 0]]
light1.intensity.value:        [[100, 100, 100]]
Edit the scene
Similarly to a Python dict, parameters can be modified in-place using the __setitem__ operator. However, it is necessary to call the SceneParameters.update method to properly apply the desired changes.
Some objects need to be notified if the children have been updated. For instance, a change to the vertex position buffer of a mesh will trigger the recomputation of the Embree/Optix BHV.
Internally, the SceneParameters object will record every update written to it. Using SceneParameters.update will propagate all updates through the dependency graph, and perform all necessary updates to the parent objects.
[5]:
# Give a red tint to light1 and a green tint to light2
params['light1.intensity.value'] *= [1.5, 0.2, 0.2]
params['light2.intensity.value'] *= [0.2, 1.5, 0.2]

# Apply updates
params.update();
Mesh editing is also possible but requires specifying the layout of the stored data. See transformation toolbox and mesh manipulation for more geometry and mesh operations.
[6]:
# Translate the teapot a little bit
V = dr.unravel(mi.Point3f, params['teapot.vertex_positions'])
V.z += 0.5
params['teapot.vertex_positions'] = dr.ravel(V)

# Apply changes
params.update();
After rendering the scene again, we can easily compare the rendered images using matplotlib.
[7]:
modified_image = mi.render(scene, spp=128)
fig = plt.figure(figsize=(10, 10))
fig.add_subplot(1,2,1).imshow(original_image); plt.axis('off'); plt.title('original')
fig.add_subplot(1,2,2).imshow(modified_image); plt.axis('off'); plt.title('modified');
